How to install Windows XP? It is hard to find a new XP version; Windows Vista and, most recently, Windows 7.0 are the new Windows Operating Systems. The operating system download is the easy part of building your own computer.
This page describes how to install Windows XP as a clean install after building a new computer. Below is a step-by-step set of instructions on how to install Windows XP. If you happen to be upgrading from an earlier version of Windows, these instructions can be used - there are just a few extra steps involved. So let's get it rolling...
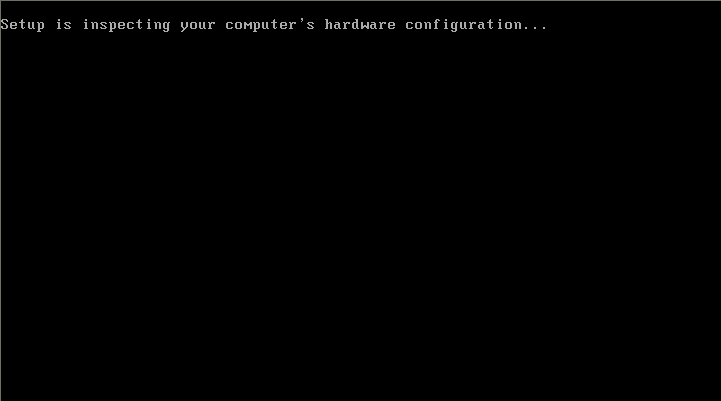
| 1. You have your Windows XP install CD or DVD in the drive, and have booted your computer. This is the first screen you will see. |
 |
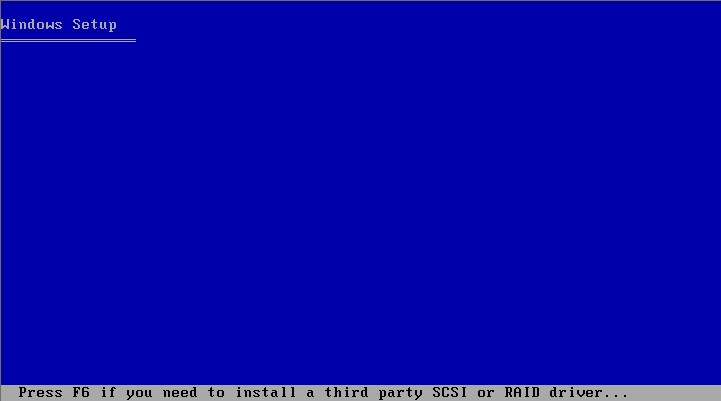
| 2. After the Windows setup begins, you will see this screen. If you have a RAID setup, or SCSI drives, press F6 here to set those up. Otherwise, wait for the Windows XP installation process to proceed to the next screen... |
 |
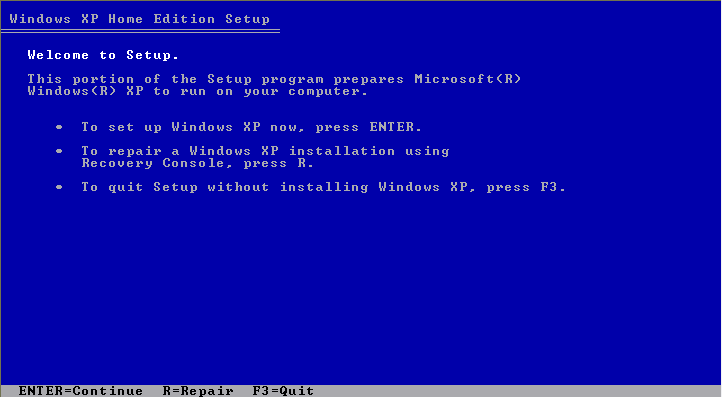
| 3. Ok, here is the start of the installation process. This screen offers you a few options. The one we want is to press Enter. The Recovery Console is if you already have Windows XP installed, and need to do a repair or recovery. F3 will cancel the install and exit setup. Press your Enter key and we'll continue on... |
 |
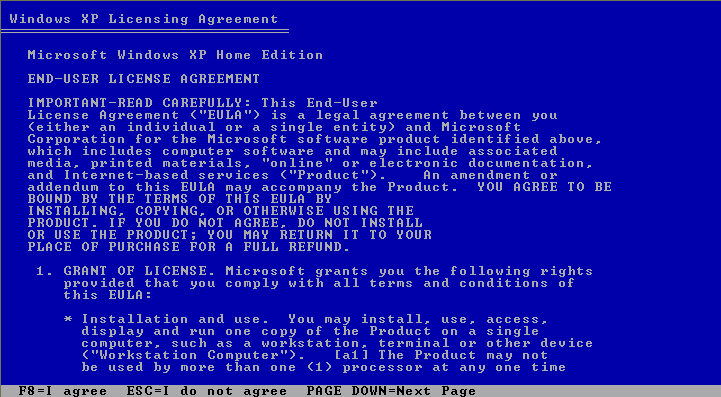
| 4. Ah, the Windows EULA - End User License Agreement. This is the Windows XP License agreement that you must agree to, or you won't be able to install Windows XP. Press F8 to agree to the license. |
 |
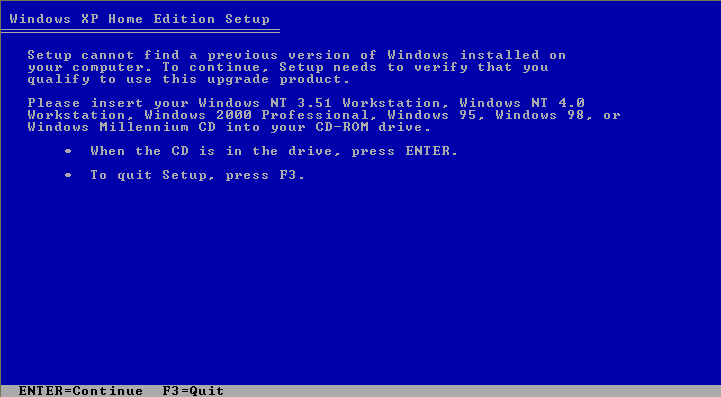
| 5. You should only run into this screen if you are doing an upgrade, or if you are installing Windows XP from an upgrade CD. In order to proceed, you need to insert your earlier Windows version CD, then press Enter. |
 |
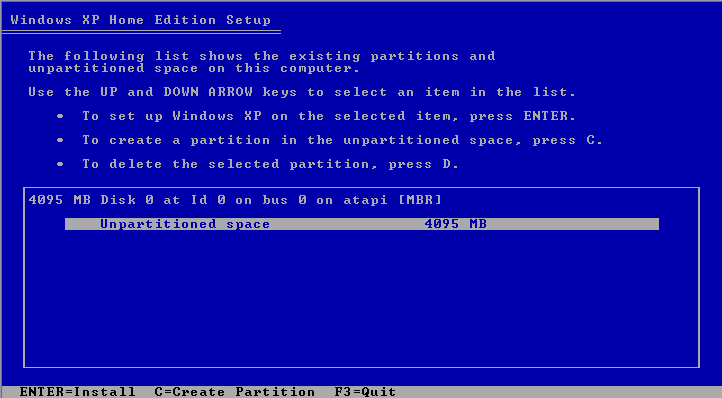
| 6. Ok, this screen allows you to choose where you are going to install Windows. If you are doing this on a new unpartitioned hard drive, you will see this screen. This is going to format your hard drive, and set it up for installation. If you have multiple hard drives, or multiple partitions on your current hard drive, you may see multiple choices here. For a clean Windows install, we want to select the C drive here. |
 |
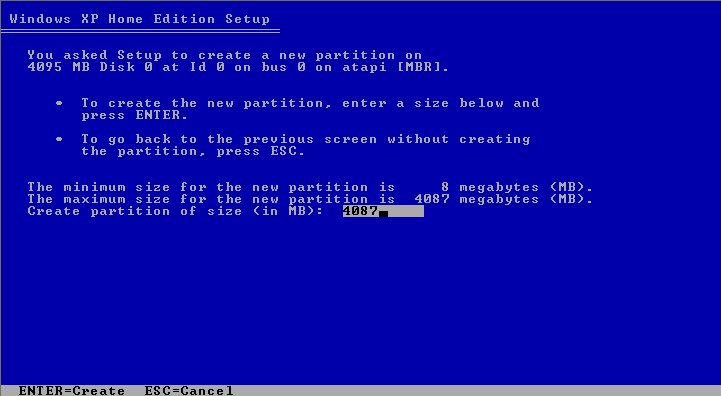
| 7. Once you start the partition creation process, you will be asked for the size of the partition. This will show you the minimum and maximum sizes for the partition. Personally, I would take the maximum size and let Windows do its thing. |
 |
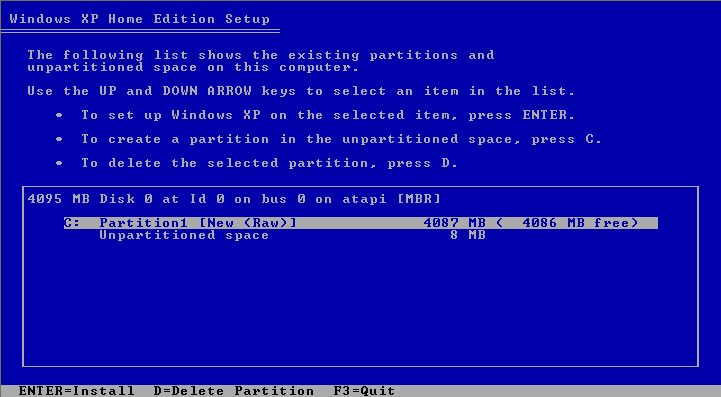
| 8. Once the partition is created, you will be returned back to this screen. If there is still unallocated space on the drive, you can choose to create another partition. You can also change the partition that was just created. Once you have the partition(s) created, highlight the one you want to install Windows XP on and hit Enter. |
 |
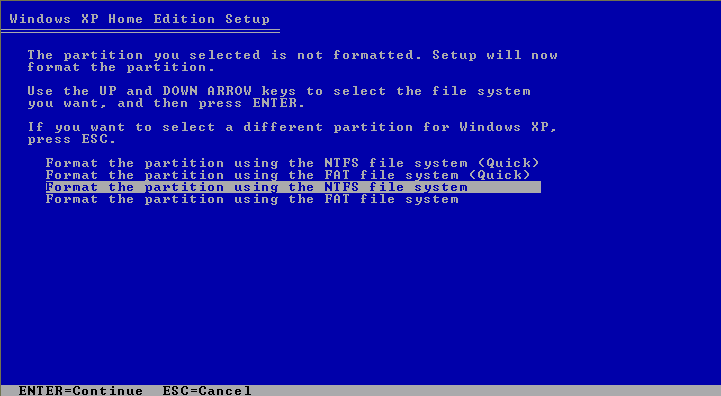
| 9. The next step is to select the file system to use for your newly created partition. I highly recommend using NTFS, but if you have a reason to go with FAT32, then do so. Can't think of a reason off hand, but you never know. Highlight your choice and press Enter to move on. |
 |
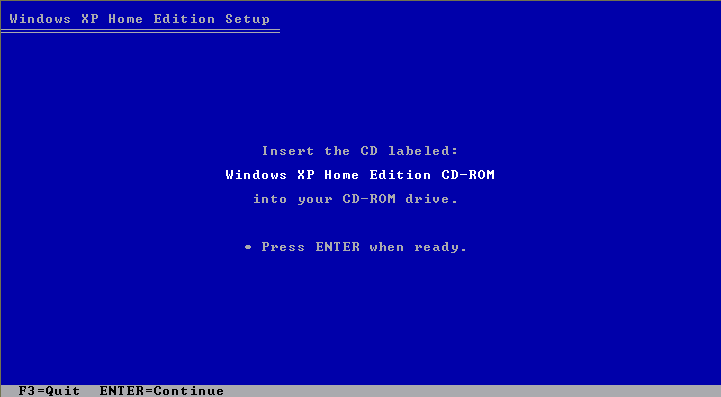
| 10. A few steps back you might have been asked to insert a previous version of Windows CD. If you did this step, this screen is telling you to re-insert the Windows XP CD. Do so, and press Enter. |
 |
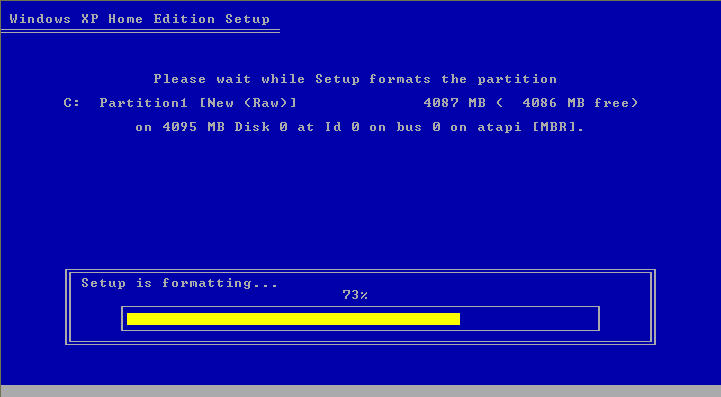
| 11. Time to create the partition. This can take some time depending on the size of your hard drive. I would suggest grabbing a snack, take a bathroom break, play with the dog - anything other than watching this. |
 |
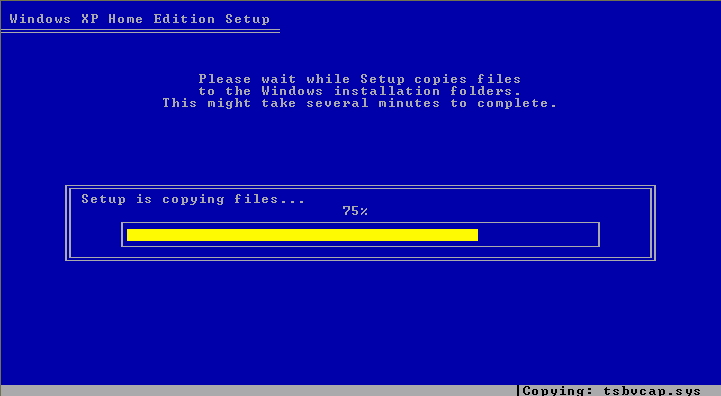
| 12. You thought the last screen was boring? Get the dog again - more of the same. The hard drive has been formatted, now the install is unpacking and copying the files needed for the install process. Perhaps a short nap? |
 |
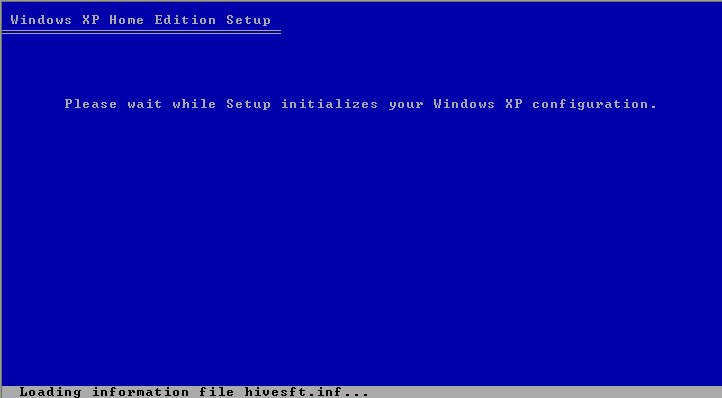
| 13. Ok, we're finally getting somewhere. This is a short screen - just getting things ready for the install. Hasn't it already been doing just that? |
 |
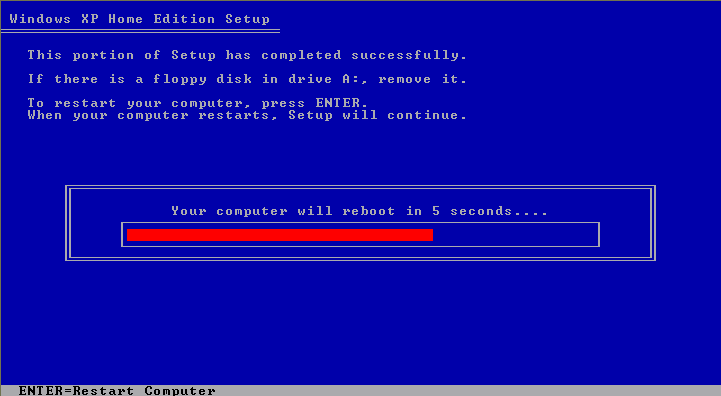
| 14. The red bar is the countdown until the computer restarts. If you are up from your nap, hit Enter to end the red bar, otherwise you can watch it as it slowly fills the box until reboot. |
 |
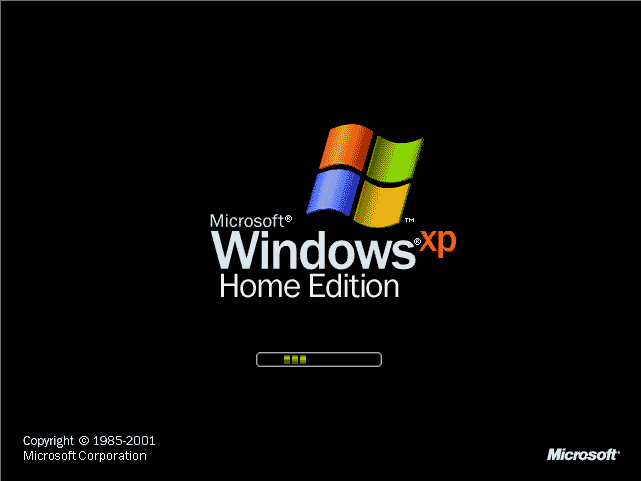
| 15. All right, coming back online for the rest of the install. You will actually get to do a few things in the upcoming screens... |
 |
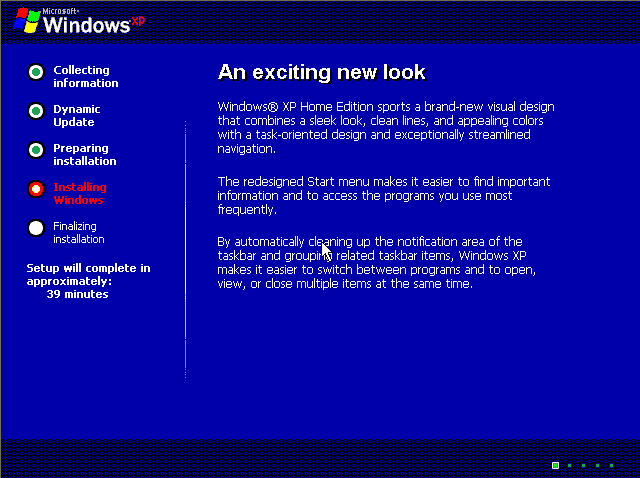
| 16. There's your countdown timer. Don't put to much stock in it, Microsoft is known for their poor timekeeping. Anyway, give this screen a few moments to get the system ready to install Windows XP. |
 |
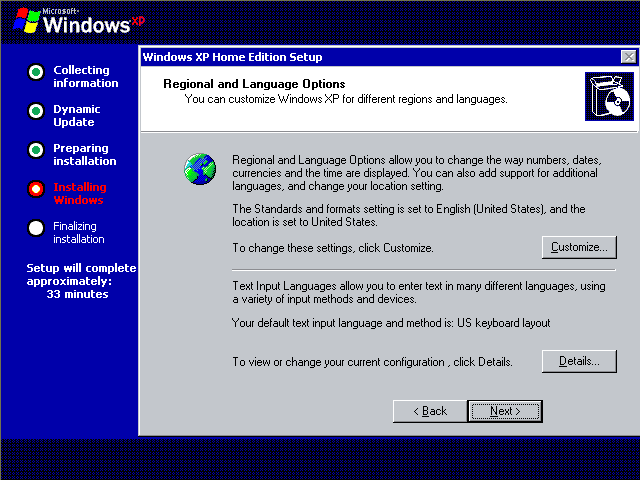
| 17. Here is something for you to do! This is the Regional and Language Options screen. You will most likely use the defaults if you are going for the English flavor. |
 |
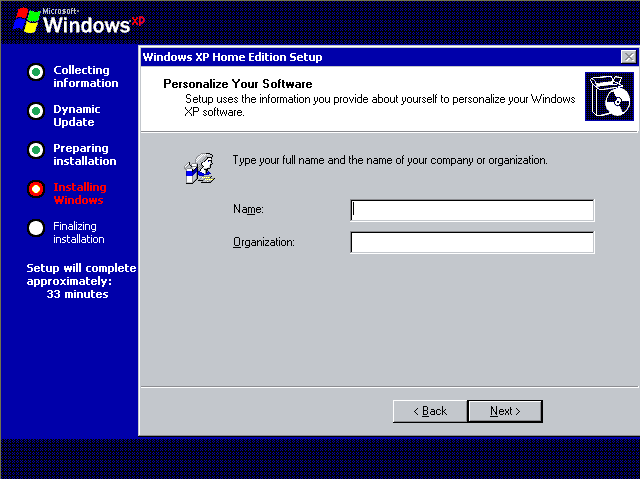
| 18. This is the Personalize Your Software screen. You can put whatever you want in the text boxes there. For example, you could call yourself Fred Flintstone, and put your company in as Slate Rock and Gravel. I normally just use my first name, and skip the company. |
 |
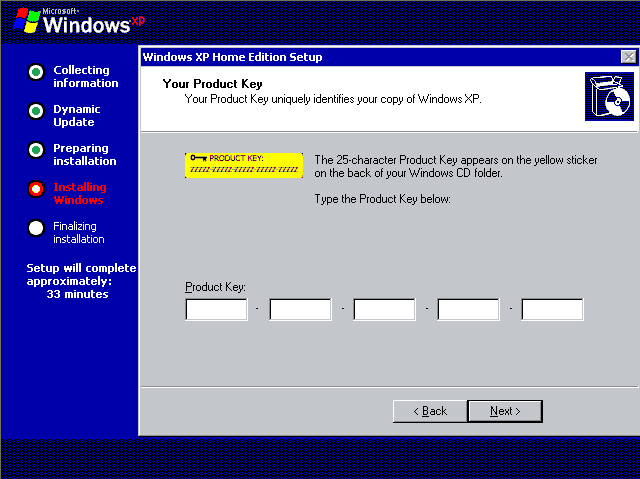
| 19. This is the license key page. You will find your license key on the back of the CD case, on a certificate that came with the CD, on the CD wrapper, etc. Once you have it, enter it in the boxes provided. If you don't have your license key, you are not going to be able to download Windows XP. |
 |
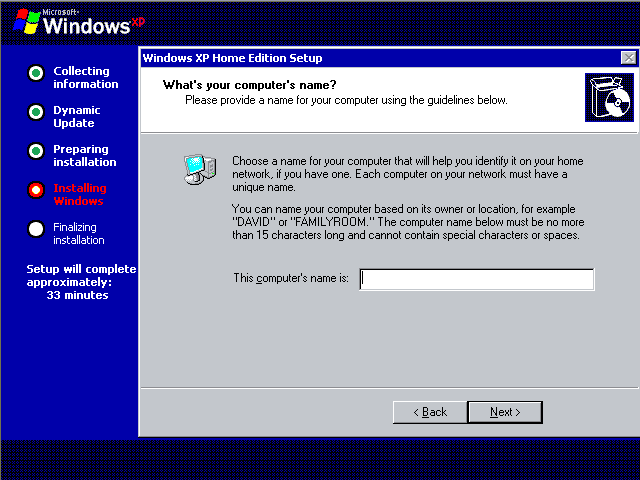
| 20. Your Computer's Name - again here, you can call your computer whatever you want - Barney if you prefer. Windows may suggest one here, but you can put anything in. |
 |
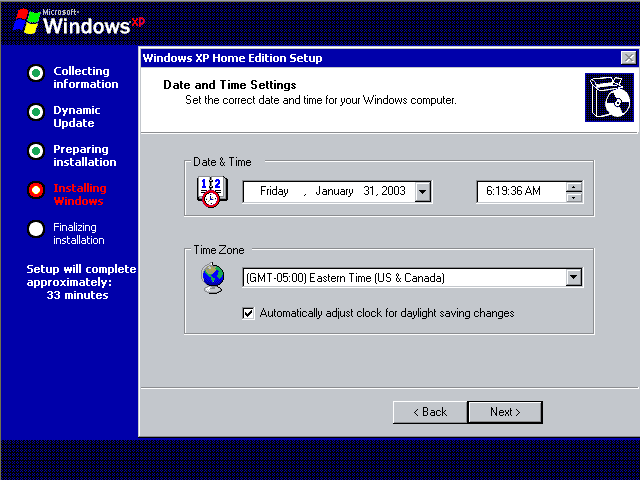
| 21. Date And Time Settings - Set these to the current date and time, along with your time zone. Almost done... |
 |
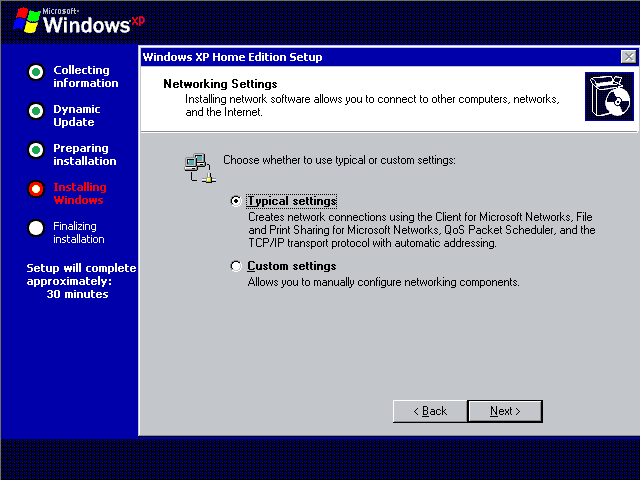
| 22. Network Settings Screen - I'd highly recommend just selecting the Typical Settings on this screen. Unless you are a network guru, the Typical Settings will work for you. |
 |
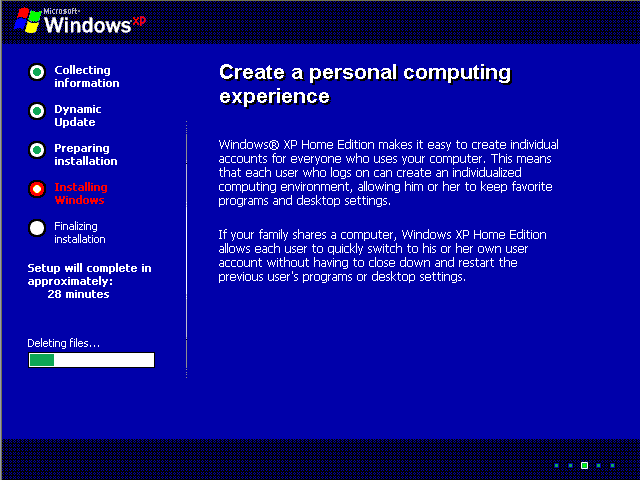
| 23. That's it - that's all the setup screens you have to deal with. This is the final one. This will run for awhile, and once it completes, your computer will restart again and boot directly into Windows. |
 |
Note: After this last restart, if you have the DVD drive set as the first drive in the boot order, you should remove the Windows CD when it reboots so that it continues directly into Windows.
New Windows operating systems are released regularly: in October 2009, Windows 7.0 was released, and prior to that Windows Vista was on the market for a couple of years.


